This post shows procedures for full backup of Windows Server 2019 and restore by Windows Server Backup that is the feature of operating system.
Backup destinations are USB HDD or Windows file share (SMB).
Preparation
Install Windows Server Backup feature on Server Manager.
OS reboot is not required after installation.
Full Backup Once
(1) Open Control Panel – System and Security – Administrative Tools – Windows Server Backup
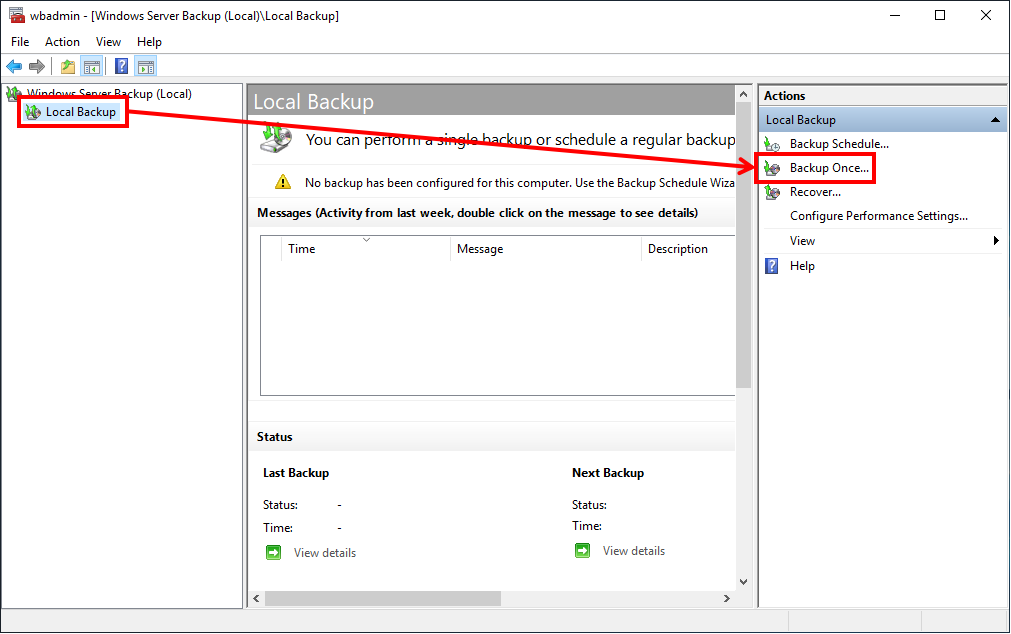
(2) Click Local Backup, and Backup Once on Windows Server Backup.
(3) Input the following values on Backup Once Wizard.
| Item | Settings |
| Backup Options | Different options |
| Select Backup Configurations | Full server (recommended) |
| Specify Destination Type | If backup to USB HDD: Local drives If backup to Windows file share (SMB): Remote shared folder |
| Backup Destination | If backup to Local drives: select volume If backup to Remote shared folder: input network path |
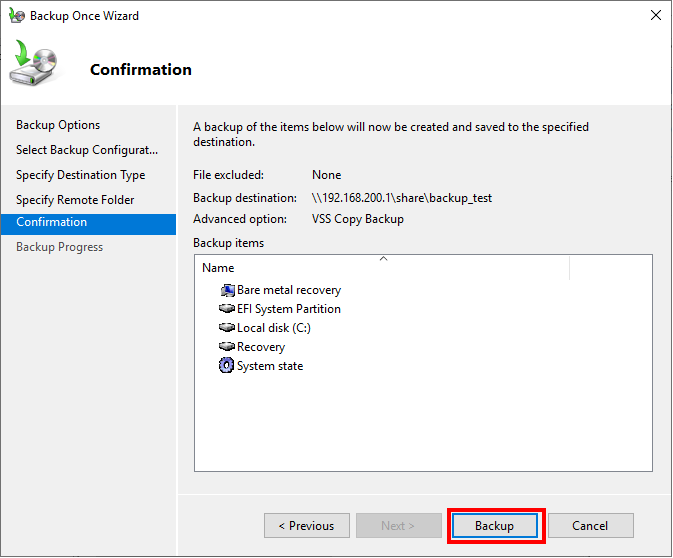
(4) Click Backup on the following window to start backup.
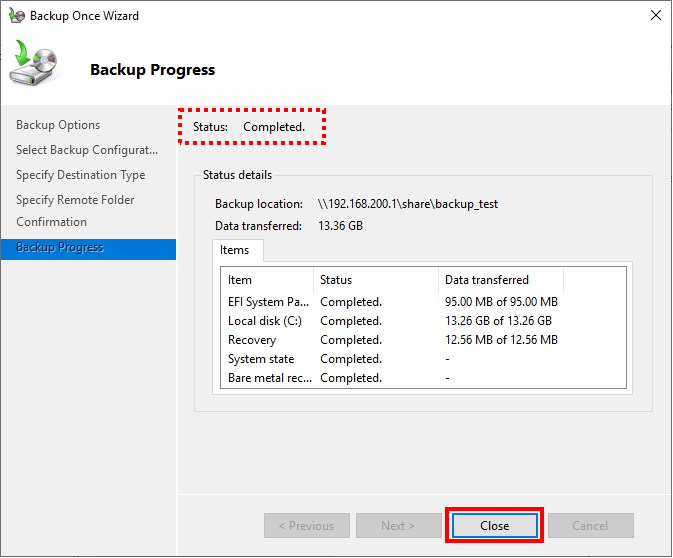
(5) Click Close after the following window shows Status: Completed.
That’s about full backup.
System Restore
(1) Boot the server form Windows Server 2019 installation media.
If backup data is on USB-HDD, connect it at this point.
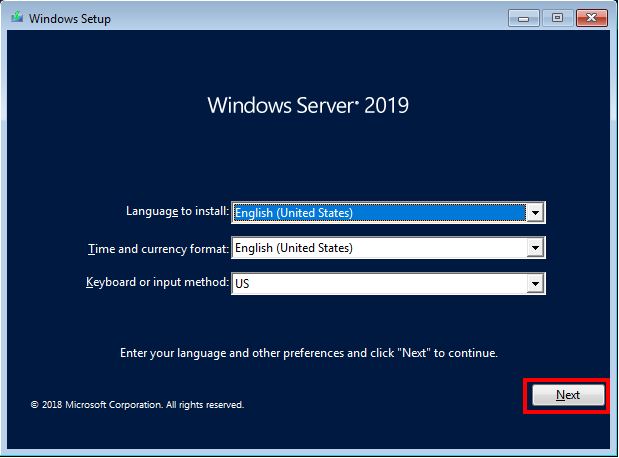
(2) Click Next on the following window.
(3) Click Repair your computer on the following window.
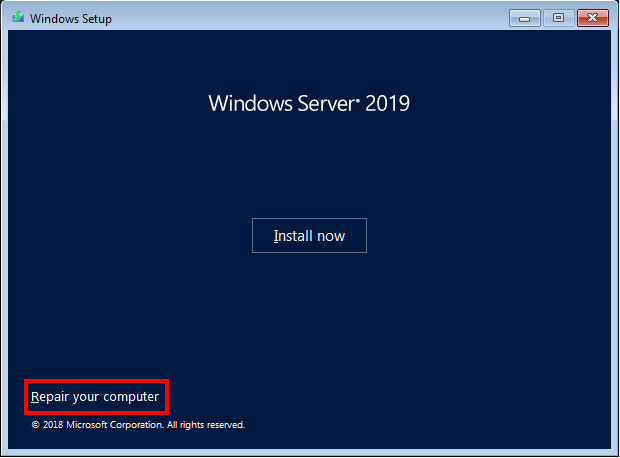
(4) Click Troubleshoot > System Image Recovery > Windows Server.
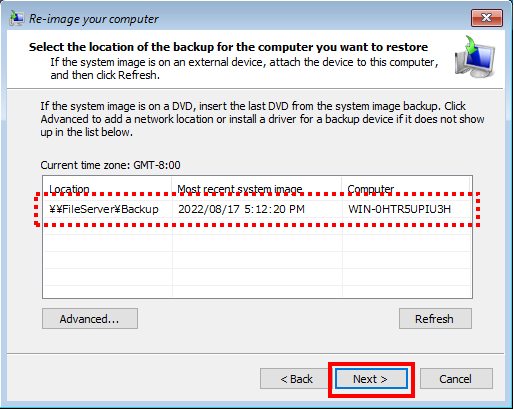
(5) If backup data is on USB-HDD, confirm the displayed image, and click Next on the following window. -> to (6)
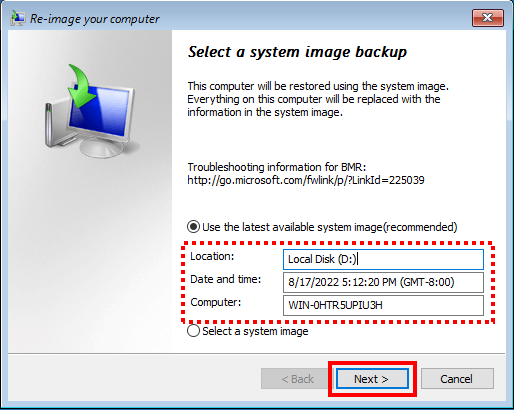
If backup data is on Windows file share (SMB), click Select a system image and Next. -> to (7)
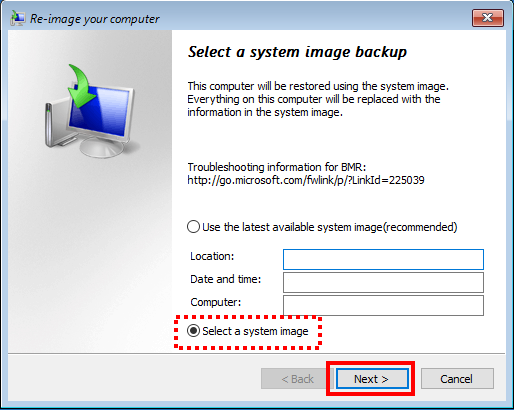
(6) If backup data is on Windows file share (SMB), click Advanced, input network path.
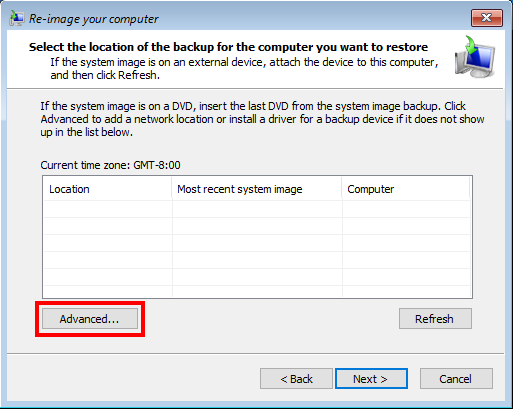
After input backup data, confirm the displayed image and click Next.
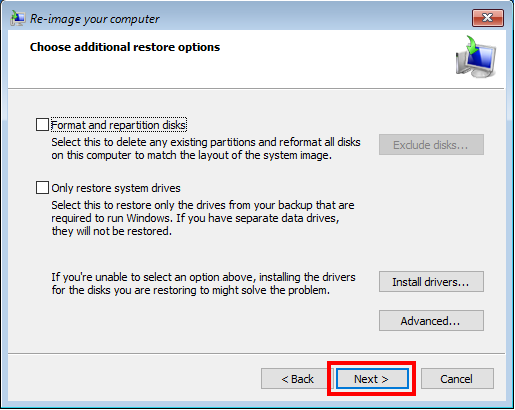
(7) Click checkboxes if necessary, and click Next on the following window.
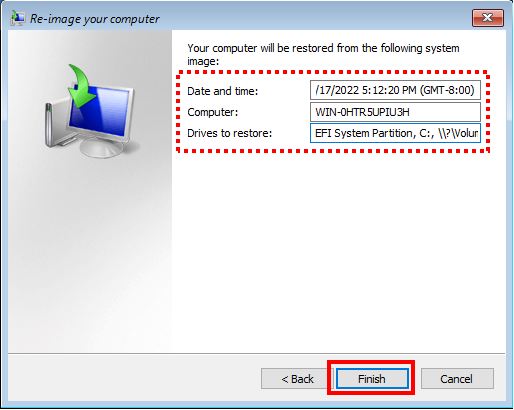
(8) 次の画面で、表示される復元イメージの内容を確認し、[完了] をクリックします。
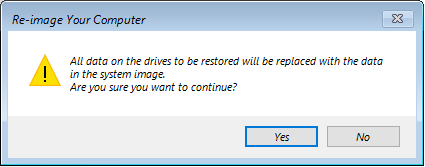
(9) Click Yes on the following window.
(10) Eject OS media form the server.
System restore starts now.
After restoration, server will restart automatically.

